
DIY scrubs are a fun and budgetfriendly way to boost your skincare routine. Making them at home means you get to customize every aspect, including texture, scent, and ingredients based on what your skin needs most. With a few pantry staples and some simple knowhow, you can put together fresh, glowing skin treatments without leaving your house. I really enjoy experimenting with these homemade recipes because my skin feels noticeably smoother and looks brighter right after.

Understanding Why DIY Scrubs Work for Glowing Skin
Fresh skin cells are always forming, but they sometimes remain hidden under layers of dull, tired skin. Scrubs help sweep away these old layers, making way for brighter, softer skin. When I started using scrubs regularly, I noticed a real difference in how my moisturizer soaked in and how smoothly my makeup sat on my face.
DIY scrubs usually mix together natural exfoliants such as sugar or oats with hydrating oils like coconut or olive oil. This pairing gently removes dead skin cells and feeds your skin with nourishing moisture. Many storebought scrubs have preservatives and added fragrances; making them at home gives you more control over what touches your face.
DIY Scrub Basics: The Main Ingredients to Know
Each DIY scrub is built on a basic formula: something to exfoliate, something to moisturize, and a little extra for glow or scent. Here’s what you’ll commonly find in my kitchenbased spa sessions:
- Sugar: White or brown sugar is a classic exfoliant for the body and lips and is gentle enough for most skin types.
- Salt: Sea salt, whether fine or coarse, is very effective for rough patches; avoid this if your skin is sensitive or broken.
- Oats: Ground oats soothe skin and provide gentle exfoliation. I love them for the face as they’re calming and won’t irritate.
- Coffee Grounds: Used coffee grounds are packed with antioxidants and can perk up circulation, giving a nice instant glow.
- Oils: Coconut, olive, sweet almond, and grapeseed oil are all great choices for hydrating skin after exfoliation.
- AddIns: Honey, yogurt, lemon juice, or a few drops of essential oil like lavender or tea tree add some extra nourishment and scent.
When you make your own, you also reduce packaging waste, which makes it an ecofriendly option. Plus, experimenting lets you skip ingredients that don’t suit your skin—something not always possible with store brands.
How to Make Your Own DIY Scrub: Simple StepbyStep Guide
Making a scrub at home is quick and simple, usually taking under five minutes. Here’s my go-to method:
- Pick your exfoliant and moisturizing base: I often mix 1 cup of sugar with ½ cup of coconut oil for a full body scrub.
- Add extras: Stir in a tablespoon of honey for hydration, or a squeeze of lemon juice for extra brightening.
- Blend and adjust: Play with your ratios. If the mix feels too thick, add more oil. If it’s too runny, add a little more sugar or oats.
- Store it: Put your scrub in a clean jar and keep it in a cool spot. Most scrubs last around a week or two since there are no preservatives.
For an extra spa touch, I sometimes toss in a few drops of my favorite essential oil, like lavender for relaxation or tea tree for its soothing effects. Making small batches means I always have a fresh, nourishing scrub ready when my skin needs it.
Popular DIY Scrub Recipes for Glowing Skin
I’ve tested tons of blends, but these are my favorites that deliver a noticeable glow and keep my skin feeling soft and fresh.
Sugar & Honey Face Scrub
- 2 tablespoons sugar (white or brown)
- 1 tablespoon raw honey
- 1 tablespoon olive oil or sweet almond oil
This scrub is gentle enough to use on your face once or twice a week. Massage gently in small circles, then rinse with warm water. Both honey and olive oil are known for being soothing and nourishing, so your skin feels smooth without feeling stripped.
Coffee & Coconut Body Scrub
- ½ cup used coffee grounds
- ¼ cup brown sugar
- ¼ cup melted coconut oil
This one wakes up tired, dull looking skin and is perfect for areas like elbows and knees. The coffee scent makes mornings more fun, and it’s a sustainable way to reuse your morning coffee grounds.
Oatmeal & Yogurt Brightening Scrub
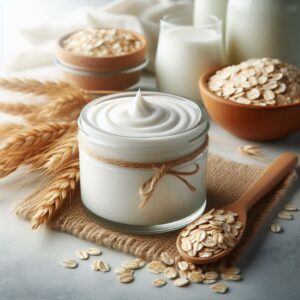
- ¼ cup finely ground oats
- 2 tablespoons plain yogurt
- 1 teaspoon honey
Mix all the ingredients until you have a thick paste. Oats soothe, yogurt exfoliates with lactic acid, and honey softens. It’s ideal for sensitive or easily irritated skin and is perfect before any special occasion for an instant healthy glow.
Key Tips for Getting the Most Out of Your DIY Scrubs
- Test before use: Try a little on the inside of your wrist to make sure you don’t react, especially with essential oils or citrus.
- Don’t overdo it: Scrubs work best a few times a week; doing them too often can make skin sensitive or dry.
- Avoid broken skin: Apply scrubs to healthy, unbroken skin for the best results and to avoid irritation.
- Choose oils wisely: Lighter oils like grapeseed work well if you prefer a less greasy feel. Coconut oil is very nourishing but may clog pores for some, especially on the face.
- Store properly: Use clean, airtight containers and avoid letting water get in the jar, since moisture can cause spoilage.
Matching Scrub to Your Skin Type
I always consider what my skin is up to before picking a scrub type:
- Dry/Sensitive skin: Oat or sugarbased scrubs with creamy or oily bases work best; avoid anything with salt or citrus.
- Oily/Combination skin: Coffee and salt scrubs can work nicely, especially mixed with a bit of yogurt or diluted lemon juice.
- Normal skin: Most scrubs are fine, so this is your playground to experiment and see what works for you.
Things to Consider Before Using DIY Scrubs
Making your own skincare is enjoyable, but I always keep a few things in mind to keep my skin happy and healthy.
- Ingredient quality: Freshness is key. Old oils can turn rancid, and using dairybased items means your scrub will only last a week if kept in the fridge.
- Poreclogging oils: Coconut and some heavier oils might not work for acne prone skin, in which case I swap for lighter or noncomedogenic options.
- Essential oils: These are strong and must be properly diluted. Use only a few drops and mix thoroughly.
- Sun sensitivity: Citrus ingredients like lemon juice can make skin more sensitive to the sun. If using a citrusbased scrub, always follow up with sunscreen.
- Hygiene: Always use clean hands or a spatula to scoop scrubs to keep things fresh and prevent bacteria.
Ingredient Shelf Life and Storage
DIY scrubs have a shorter shelf life than storebought ones because they lack artificial preservatives. I make small batches, use them within a week or two, and always refrigerate them if they include fruit, dairy, or water. Keep scrubs away from sunlight and moisture to help them last longer. If a scrub smells off or looks strange, toss it and make a new batch for safety.
Extra Skincare Tips for Radiant, Healthy Skin
Glowing skin isn’t just about exfoliation. Pairing a scrubbing routine with other skincare basics amplifies your results:
- Moisturize after scrubbing: Exfoliation helps your moisturizer work better, so always follow with a nourishing cream or serum.
- Stay hydrated: Drinking enough water keeps skin plump and bright from the inside out, not just from what you apply on the surface.
- Eat well: Foods rich in antioxidants, healthy fats, and vitamins naturally give your skin a beautiful glow.
- Don’t skip sunscreen: Freshly scrubbed skin is more sensitive to UV rays. A daily SPF is especially important for healthy results.
In addition to the basics, I sometimes throw in a self-care ritual, like a relaxing face mask or facial steam. This can be a fantastic way to wind down, making the whole skincare process enjoyable and even more effective.
Frequently Asked Questions
Question: How often should I use DIY scrubs?
Answer: Most people find that 1-2 times per week works well. If your skin gets irritated or feels extra sensitive, it’s best to take a break and focus on gentle cleansing and more moisture instead.
Question: Can I use a scrub if I have acne?
Answer: Gentle options like oat and yogurt scrubs are generally better for acne-prone skin. Skip anything rough, like salt or coarse sugar, if you’re having flare-ups. Always check in with a dermatologist if you’re unsure about what works for your skin type.
Question: What should I do if my skin feels dry after scrubbing?
Answer: Apply a gentle, fragrancefree moisturizer right away. Oils such as jojoba or sweet almond can also help lock in moisture without being too heavy.
Give Homemade Scrubs a Try
DIY scrubs are an easy and affordable way to step up your skincare and get that healthy glow everyone notices. Whether you’re looking for deep exfoliation or just a little pickmeup, making your own scrub is a simple ritual that feels creative and rewarding. Be mindful of your skin type, use fresh ingredients, and always pay attention to what your skin needs each day. My bathroom shelf is packed with homemade blends and I genuinely love how many options are available when you start crafting scrubs yourself. Check out a new recipe this week—your skin will thank you!