
How To Make A Skin Glow Serum 2026: The Ultimate DIY Guide
Looking for the best way to get radiant skin at home? In this guide, we’ll show you exactly how to make a skin glow serum in 2026 using professional-grade ingredients for that perfect “glass-skin” finish.
If you’re chasing that smooth, glassy glow in 2026, making your own skin glow serum at home is totally doable. Plus, it can be pretty rewarding. The secret is nailing down the right blend of high-performance ingredients like stabilized Vitamin C and hyaluronic acid. These days, skincare fans want targeted results, minimal fuss, and pure, reliable formulas. A DIY serum lets you take charge and gives you the fun of customizing for your skin’s ever-changing needs.
Whether you’re new to homemade skincare or looking to take your routine up a notch, this step-by-step guide covers exactly how to whip up a glow serum that really works. I’ll break down the equipment, ingredients, mixing process, and the tips that keep your creation safe, fresh, and super effective. We’ll also check out a few common questions and offer advice for getting the best results, so your serum doesn’t just gather dust on your bathroom shelf.
Choosing Your Core Ingredients
Getting that glowy, hydrated look all comes down to picking the right players for your serum. Some ingredients do an amazing job of delivering visible results and long-lasting benefits, helping you maintain a fresh, radiant complexion every day.
What are the key ingredients in glow serum?
- Stabilized Vitamin C (L-Ascorbic Acid or SAP/MAP): A powerful antioxidant that brightens, evens out tone, and protects against free radicals.
- Hyaluronic Acid (Low/Medium Molecular Weight): Draws in moisture, plumps, and leaves skin bouncy. This is super important for that glass skin effect.
- Niacinamide (Vitamin B3): Smooths skin, minimizes appearance of pores, and supports your skin’s barrier strength.
- Panthenol (Vitamin B5): Calms, hydrates, and soothes.
- Ferulic Acid or Vitamin E: Gives a boost and stabilizes Vitamin C, adding extra antioxidants.
- Optional: Botanical extracts (like Licorice Root or Centella) for even more soothing and brightening.
Storebought glow serums often use these combos for a reason. They each work great solo, but when you blend them, you get next-level cool results for dull, tired, or uneven skin.
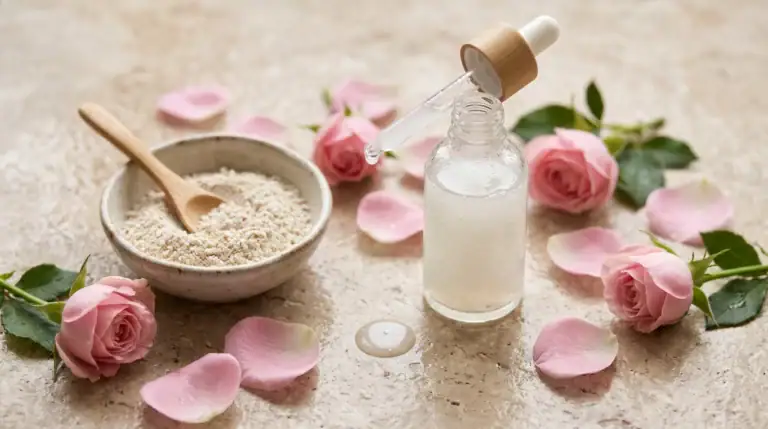
Gathering Equipment & Ingredients
You don’t need a full-on chemistry lab for this, just some clean basics and reliable measuring tools. Here’s what I grab every time I make a fresh batch:
Equipment List
- Small glass beaker or heatproof bowl for mixing
- Mini whisk or glass stirring rod (avoid plastic if possible because it might react with some active ingredients)
- Digital kitchen scale accurate to 0.01 grams, if you can get one
- Dropper bottles or airless pump bottles, picking amber or blue glass to protect your formula from light
- Sterilized funnel and pipette
- pH test strips
- Nitrile gloves, paper towels, and alcohol spray for cleanup
Ingredient List (For 30ml, about 1 fl oz)
- Distilled water: 15g
- Hyaluronic acid powder (0.3%): 0.09g
- Stabilized Vitamin C (Sodium Ascorbyl Phosphate, 10%): 3g
- Niacinamide (5%): 1.5g
- Panthenol (1%): 0.3g
- Vitamin E (Tocopherol, 1%): 0.3g
- Glycerin (3%): 0.9g
- Preservative (Euxyl PE 9010 or similar, 1%): 0.3g
- Optional: Licorice Extract or Centella Extract (0.5g)
All ingredients should be cosmetic or food grade. Buying from a reputable supplier is crucial so you know exactly what’s going on your skin and avoid unwanted reactions.
Step-by-Step: How To Make Homemade Glow Serum
Making skincare formulas at home feels a lot like crafting the perfect cup of coffee. Take your time with each step and you’ll get a serum that’s smooth and powerful.
1. Prep Your Workspace
- Wipe down all surfaces with alcohol spray.
- Sterilize tools in boiling water or wipe with isopropyl alcohol and air dry thoroughly.
- Put on gloves and tie your hair back so nothing falls into the mixture.
2. Dissolve the Actives
- Measure out your distilled water in the beaker.
- Add in the hyaluronic acid powder, letting it rest for 20 to 30 minutes. It’ll look a bit clumpy at first, so keep whisking until everything is fully dissolved.
- Add niacinamide and stir until completely smooth and blended.
3. Add Vitamin C and the Rest
- Sprinkle in the Vitamin C powder and mix until no lumps are left behind.
- Add glycerin, panthenol, Vitamin E, and any optional extracts you like.
- Whisk for at least a minute for a silky, clear blend.
4. Add the Preservative and Test pH
- Add the preservative as the last step and whisk thoroughly.
- Using pH strips, test your mixture. Your serum should land between 5.0 and 6.0 for gentle, skin-friendly use. If it’s out of range, a pinch of citric acid can lower it or a tiny amount of sodium bicarbonate can raise it. Mix and check a little at a time until you’re there.
5. Bottle Up Your Serum
- Use your funnel to pour the finished serum into the sterilized bottle. Don’t overfill; leave a bit of space at the top.
- Seal the bottle tightly, label it with the date, and store in the fridge for a longer shelf-life and max potency.
Once your serum is bottled, you’re ready to see the real changes in your skin. Homemade formulas let you work with super fresh actives, so you often see results faster than with storebought options.
Safety, Shelf-Life & Customization
How do I keep my homemade serum safe?
- Always use clean, sterilized tools and bottles for every batch to keep bacteria away.
- Choose a broad spectrum preservative. Even natural boosters like Vitamin C or plant extracts need this guard against bacteria and mold.
- Store your serum in a cool, dark place. Don’t let the dropper touch your skin directly since that can contaminate the batch.
The shelf-life of your homemade serum is around 3 to 4 months in the fridge or 2 months if kept at room temperature, as long as it’s cool and dry. If your serum changes color, smells odd, or separates, play it safe by tossing it and making a new one. It’s always smart to do a patch test, especially if your skin is on the sensitive side.
Can I tweak or pump up this recipe?
Definitely! If you want to give your serum an extra boost, try a drop of rosehip seed oil for added antioxidants or introduce a few drops of your preferred essential oil. Make sure anything you add is skin-safe and don’t go above 0.5% of your total formula when using essential oils. Always look up ingredient compatibility: not everything plays nicely with Vitamin C, so double-check before mixing.
You can also swap in different botanical extracts or slightly adjust the ratios based on what your skin loves most. That’s the beauty of making it yourself—your serum is tailored just for you.
Common Questions Answered
How to make homemade glow serum?
Blend distilled water, hyaluronic acid, stabilized Vitamin C, niacinamide, and a broad-spectrum preservative, following the method outlined above. Careful measuring and mixing ensures a serum that’s effective and safe.
Which serum can make skin glow?
Formulas that combine stabilized Vitamin C, hyaluronic acid, and niacinamide are excellent at brightening and boosting skin’s radiance. These ingredients deeply hydrate and guard your skin from daily stress.
How to get glowy skin serum?
Create your own custom serum with high-quality actives, pay attention to proper mixing, and keep your finished product fresh. This is your ticket to achieving that dewy, “glass skin” look at home.
What are the key ingredients in glow serum?
Stabilized Vitamin C, hyaluronic acid, niacinamide, Vitamin E, and panthenol all play crucial roles in giving you brighter, healthier, and smoother skin.
Using Your Glow Serum for Maximum Results
- Apply 4 to 6 drops after cleansing your face, both in the morning and at night.
- Let the serum sink in for about a minute, then apply moisturizer and sunscreen in the morning. The layering helps seal in all the good stuff.
- Stick with your serum routine consistently; this is the key to seeing firmer, smoother, and more radiant skin. Most people spot real improvements in just 2 to 3 weeks of use.
Consider taking before-and-after photos to track your results, and jotting down some notes about what seems to work best for your skin type. Curious about other actives like peptides or ceramides? Feel free to experiment once you’re comfortable with the basics. DIY skincare truly puts you in the driver’s seat, letting you stay mindful of what goes on your face. With this serum recipe, you get all the glow you crave, minus the fillers and mystery extras some storebought brands add in. Give it a try and see how simple and satisfying a routine upgrade can be!
Disclaimer: This guide is for educational purposes. Always perform a patch test before using DIY skincare products. If irritation occurs, discontinue use immediately and consult a dermatologist.

Absolutely loved this breakdown! The step‑by‑step instructions make the whole process feel so achievable. I’m genuinely excited to try this glow serum recipe for myself — the ingredient combo sounds amazing for that glass‑skin finish. Can’t wait to see how it turns out.
Thank you so much for your kind feedback! I’m really glad the step-by-step format made it feel easy and approachable for you.
That “glass-skin” glow is exactly what this kind of simple, well-balanced formula is designed to support—hydration, gentle nourishment, and consistency really make the difference over time.
I’m excited for you to try it, and I hope you enjoy both the process and the results. Feel free to share how it works for your skin!
This was such an informative read! I appreciate how clearly everything was explained, from the ingredients to the pH testing. I’m honestly so inspired to make this glow serum myself now. The formula looks powerful but still simple enough to whip up at home. Excited to give it a go.
What can you recommend to boost Collagen and anti-Aging?
Thank you so much for your kind feedback! I’m really glad you found the guide informative and easy to follow. It’s wonderful to hear that you feel inspired to try making the glow serum yourself.
For boosting collagen and supporting anti-aging naturally, there are a few ingredients and habits that can make a big difference over time. Vitamin C is one of the best because it helps support collagen production while also brightening and protecting the skin from environmental stress.
Other great options include:
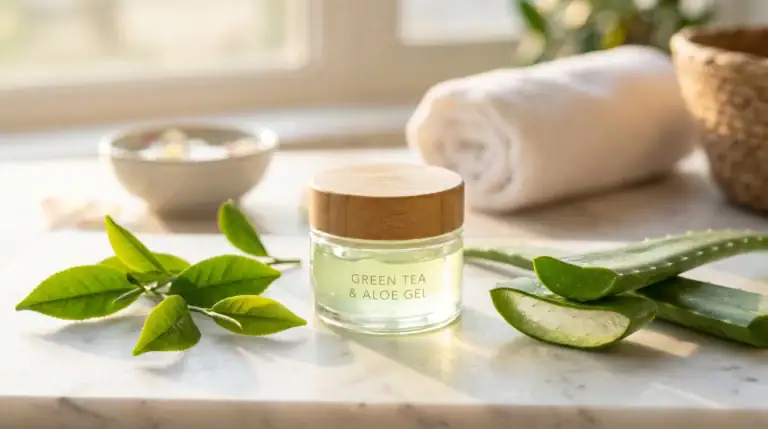
* Aloe vera for hydration and skin repair
* Honey for moisture and antioxidant support
* Green tea for its calming and protective antioxidants
* Rosehip oil for nourishing the skin and improving texture
* Gentle exfoliation to encourage skin renewal
One of the most important anti-aging habits is actually daily SPF protection, since sun exposure is one of the main causes of collagen breakdown and premature aging.
For DIY skincare, keeping routines simple, hydrating, and consistent usually gives the best long-term results. Healthy skin barriers and regular moisture support are key for maintaining smooth, glowing skin over time.
I’m excited for you to try the serum, and I hope you enjoy experimenting with your own natural skincare creations!
DIY skincare like this is really appealing, especially when you can control the ingredients and keep things simple. It’s nice to see a guide that makes it feel doable instead of overwhelming.
From my experience, the biggest challenge with homemade products is getting the right consistency and making sure it actually works well with your skin over time. Sometimes what sounds good doesn’t always give the expected results.
Do you have any tips for testing a new serum safely before using it regularly, especially for people with sensitive skin?
Thank you so much for your thoughtful comment you make such a great point about DIY skincare feeling more approachable when the ingredients and process are kept simple and intentional.
You’re also absolutely right that consistency and skin compatibility can sometimes be the biggest challenges with homemade products. Even natural ingredients can affect people differently, which is why introducing new products slowly is so important.
For sensitive skin, one of the best ways to test a new serum safely is to start with a patch test. Apply a small amount to an area like the inside of the wrist or behind the ear and wait 24 hours to see how your skin reacts before using it more broadly.
I also recommend:
Starting with very small batchesKeeping the ingredient list simple at firstUsing lower concentrations of active ingredientsIntroducing only one new product at a time
That makes it much easier to identify what works well for your skin and avoid irritation or confusion if sensitivity occurs.
Most importantly, consistency and patience tend to give better results than using too many ingredients at once. I’m really glad you brought this up because mindful testing is such an important part of safe DIY skincare!
This is great, finally a way for us to make a beneficial skin serum in the comfort of our own home. I just have to find a reputable shop to buy the raw ingredients.
I was just wondering if it was ok to add the vitamin C and then store it. I always thought that once vitamin C was exposed to light it started to lose some of its magical powers.
Thank you so much for your thoughtful comment I’m really glad you found the guide helpful!
You’re absolutely right to think about how Vitamin C reacts to light and air. Once mixed, Vitamin C can begin to oxidize over time, especially if it’s exposed to light, heat, or air too often. That’s why storing the serum properly is so important.
Using a dark glass bottle, keeping batches small, and storing the serum in a cool place can help preserve its effectiveness for longer. Some people even prefer refrigerating small batches to slow oxidation further.
If you notice the serum turning dark yellow or orange, that’s usually a sign it has started to oxidize and may no longer be as effective.
I’m glad you brought this up because proper storage really does make a big difference when making DIY Vitamin C skincare at home. Thank you again for your great question!
Hi there,
This is such a clear and practical guide—I love how you break everything down step by step without making it feel intimidating. The ingredient explanations are especially helpful, and I appreciate that you included exact percentages and the importance of pH testing. It really makes this feel more “professional” than most DIY recipes out there.
I also like that you talked about safety and shelf-life, because that’s something a lot of DIY skincare posts skip over. It makes a big difference in actually trusting the process.
One question I had while reading: how do you adjust this formula for very sensitive or reactive skin—would you lower the Vitamin C percentage or swap it for a gentler alternative?
Thank you so much for your thoughtful and encouraging feedback I truly appreciate it!
I’m really glad the guide felt clear, practical, and approachable while still giving enough detail to make the process feel more reliable and professional. Including things like pH testing, ingredient percentages, safety, and shelf-life is so important with DIY skincare, especially when working with active ingredients like Vitamin C.
For very sensitive or reactive skin, I would usually recommend starting with a lower Vitamin C concentration rather than jumping into a stronger formula right away. Keeping the percentage gentle can help reduce the chance of irritation while still allowing the skin to gradually adjust.
Another option is using a gentler Vitamin C derivative instead of pure ascorbic acid, since some forms tend to be less irritating while still offering antioxidant and brightening benefits over time.
Most importantly, I always suggest patch testing first, introducing the serum slowly, and keeping the rest of the skincare routine simple while the skin adjusts.
Thank you again for such a thoughtful question and for taking the time to share your feedback!
Great guide for anyone wanting to try DIY skincare at home. As a soap maker, I really appreciate the focus on proper measurements, pH testing, and using preservatives correctly because those steps are so important for safe homemade products. I also love how clearly you explained the ingredients for beginners. Have you experimented with adding any botanical hydrosols to your glow serum recipes?
Thank you so much for your thoughtful comment—it really means a lot coming from someone who already works with soap making and understands formulation at a deeper level.
You’re absolutely right about measurements, pH, and preservatives being essential. Those are often the “invisible” parts of DIY skincare that make the biggest difference in both safety and performance, even though they’re sometimes overlooked in beginner recipes.
Yes, botanical hydrosols can be a beautiful addition to glow serum formulations. They’re often used as a gentle water phase base or as part of the hydrating component, and they can add both subtle skin benefits and a lovely natural scent profile depending on the plant used. For example, rose hydrosol is often associated with soothing and toning effects, while lavender hydrosol is commonly used for calming-feeling blends.
One thing I’ve found important is making sure the hydrosol is high quality and properly preserved or freshly handled, since it behaves much like any water-based ingredient in terms of shelf stability. It also helps to adjust the overall formulation carefully so the serum still maintains the right balance between hydration, actives, and preservation system.
I really appreciate you bringing this up—botanical waters can definitely elevate a simple serum when used thoughtfully. Thank you again for sharing your experience and insight!
How to make a skin glow serum with up to date information for 2026 is awesome. As we age our skin seems to require more care than when we are younger.
The step-by-step guide with the ingredients and instructions make this article extremely worthy for read and share. Since this will benefit so many people especially seniors, I will be sharing the link to this article with my family and friends.
You have provided us with such an easy and simple step-by-step guide to follow, thank you for taking the time to write this article for readers like myself.
Jeff
Thank you so much for your kind and encouraging feedback it truly means a lot!
You’re absolutely right that as our skin matures, it often needs more support, hydration, and consistency than it did when we were younger. That’s one of the reasons I wanted the guide to feel simple, practical, and approachable rather than overwhelming.
I’m really glad you found the step-by-step instructions helpful and easy to follow. Skincare should feel empowering and manageable for everyone, including people who may be completely new to DIY skincare or looking for gentler, more natural alternatives.
It also means so much to hear that you’ll be sharing the article with your family and friends. Thank you for your support and for taking the time to leave such a thoughtful comment it’s truly appreciated!