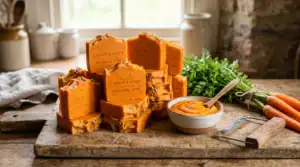
First, Fresh carrot soap is a classic for anyone wanting glowy, healthy skin without a ton of chemicals. I love how homemade carrot soap feels a little rustic, super creamy, and packed with skin-loving goodness.In fact, Right from my first batch, I noticed my skin looked brighter and felt softer. It’s one of those DIY projects where you can really see and feel a difference, plus it turns your bathroom into a mini spa with that earthy, natural aroma.
Carrots bring a punch of Vitamin A
They also contain antioxidants that help brighten skin and support a smoother complexion. If you are looking for more ways to get that glow, check out my Natural Skin Brightening Guide → When these nutrients go straight into cold process soap, you get a gentle bar that’s great for daily use. Here’s the full how-to, from prepping fresh carrots to that all-important cure time for a rich, long-lasting soap. You’ll also pick up some cool tips on customizing your batch, so you can tweak ingredients to match your skin’s needs or personal scent preferences.
Why Carrot Soap Makes Skin Glow
Carrots aren’t just for eating. They’re loaded with betacarotene (the thing that makes them orange), Vitamin A, and antioxidants. When you use carrot puree in soap, those skin-loving phytonutrients help fade uneven tone and give a healthy glow, with no harsh bleaching and just gentle brightening.
How Vitamin A Fights Aging
Betacarotene and Vitamin A support your skin by fighting free radicals. Think of these as little troublemakers that speed up signs of aging. Regular use can leave skin looking fresher and feeling smoother, and it’s gentle enough for sensitive skin. Plus, soaps with fresh carrot puree often moisturize while they cleanse, which is great during dry seasons or for folks who struggle with chapped skin.
Gathering Ingredients and Equipment
Here are the key ingredients you will need:
- Pure carrot puree: 100g (about 2/3 cup, packed and drained)
- Olive oil: 400g
- Coconut oil: 300g
- Shea butter: 100g
- Distilled water: 240g
- Sodium hydroxide (lye): 100g
- Optional: essential oils (like orange, lavender, or teatree, 5–15g total)
Equipment You’ll Need:
- Digital scale (for accuracy, no cups or spoons)
- Immersion blender
- Heatproof mixing bowls (stainless steel or heavy plastic)
- Dedicated soap mold (silicone or lined wooden works best)
- Wooden or silicone spatula
- Safety goggles, gloves, and a mask
- Apron and long sleeves
⚠️ Safety First: The Lye Protocol
Lye is no joke. To stay safe while making your carrot soap, always follow these rules:
- Protect yourself: Wear gloves, an apron, goggles, and a mask.
- Ventilation: Work in a space with good airflow to avoid fumes.
- The Golden Rule: Always add lye to water—never water to lye.
- Environment: Keep your workspace clear of kids and pets.
- First Aid: Keep vinegar handy and rinse skin with cool water if splashes occur.
Additionally, only make soap on a calm, focused day. Safety isn’t optional; it’s essential for every batch.
Step-by-Step: Making Cold Process Carrot Soap
- Prep the carrot puree: Peel and chop 2–3 medium carrots. Steam until soft, then blend until very smooth. Allow to cool and drain off excess water. Puree that’s too watery can ruin the batch.
- Melt oils and butter: In a large bowl, combine olive oil, coconut oil, and shea butter. Gently heat until melted (a double boiler or short microwave bursts both work). Cool to about 38–43°C (100–110°F).
- Gear up for lye mixing: Throw on your goggles and gloves. Work in a ventilated area (or outside). Carefully measure lye and distilled water by weight using the digital scale. Accuracy matters.
- Mix the lye solution: Pour the lye very slowly into your water (never the other way around!), stirring with a heat-safe spoon. The mixture will heat up and release fumes. Let it cool to around 38–43°C (100–110°F).
- Combine lye solution and oils: When both are at similar temperatures, pour the lye mixture into the melted oils. Blend in short bursts using the immersion blender, alternating with stirring by hand.
- Add carrot puree: When you hit light “trace” (the texture of thin custard; lines from the blender stay on the surface), add in the carrot puree. Mix until evenly combined.
- Add essential oils (optional): Toss in your chosen scents. Keep blending and stirring until the soap batter thickens (medium trace).
- Pour into molds: Quickly pour into your prepared soap mold. Tap the mold gently to pop air bubbles. Swirl the top with a spatula for that rustic, homemade look.
- Insulate and saponify: Cover with a towel and keep in a warm, draftfree spot for 24–48 hours to fully set.
- Unmold and cut: Once solid, pop the soap out and cut it into bars using a soap cutter or sturdy knife.
- Cure the soap: Place bars on a rack in a cool, dry spot with plenty of airflow. Let cure for 4–6 weeks. This step can’t be skipped. Curing helps the soap harden and become mild enough for skin. Using it too soon can irritate your skin and the soap won’t last as long.
Pro soap tip: Label your soaps with the date made, so you know exactly when your bars will be perfectly cured and ready to use for that creamy lather you’ll love. A little patience at this stage gives you bars that last longer and feel even better on the skin.
Tips For The Best Carrot Soap
- Always measure everything by weight. Soap is science, and accuracy is super important for safety and results. No eyeballing, and skip the measuring cups and spoons.
- Keep essential oils simple. Citrus or gentle florals work best with carrot’s earthy scent. Some essential oils cause soap to thicken quickly, so work fast.
- Bright, fresh carrot puree gives the richest color and best nutrients. Skip storebought carrot baby food; it’s too watery.
- If you want a swirl of colors, save some plain batter and mix in the carrot puree separately, then swirl for an extra eye-catching effect in each bar.
Troubleshooting Carrot Soap
Soap seized up fast!
Carrot puree, clove, or cinnamon essential oil can make cold process soap thicken way too quickly, which is called “seizing.” If this happens, skip the fancy swirls and spoon it into the mold fast. Bars will still work fine! Next time, measure ingredients carefully and skip known thickening scents if you like more time for creative designs.
I see a white powder on the soap. What’s that?
That’s soda ash, a harmless result of lye reacting with air. It wipes off, and you can help prevent it by covering the mold tightly with plastic wrap as soon as you pour the soap. It won’t hurt your skin or the final bar’s quality.
Soap is too soft or sticky.
Double-check your measurements or allow more cure time. High humidity or too much puree can create soft soap. Try fans or a dehumidifier for faster drying. If all else fails, give your bars some extra days to harden up. They’ll only get milder and gentler with time.
FAQ: Common Carrot Soap Questions
Can carrot soap lighten skin?
Carrot soap doesn’t bleach skin, but it can help gently brighten and even out your skin tone thanks to Vitamin A and antioxidants. Longterm use may give your skin a healthier, more luminous look. No dramatic color changes, just a fresh glow.
Is carrot soap good for acne?
Yes, carrot soap is great for acneprone skin. The Vitamin A in carrots helps regulate oil production and can calm inflammation. Coconut oil and shea butter also add moisture without clogging pores. If you’re prone to breakouts, stick to a mild formula and patch test first.
Can I use carrot juice instead of puree?
You can use carrot juice, but the color is usually paler and you’ll lose some nutrients found in the fiber-rich puree. For the brightest orange color and the most antioxidants, puree is the way to go.
Why the Cure Time is Important
Carrot soap is ready to use after at least 4 weeks of cure time, so patience pays off. During this time, slices get firmer, milder, and produce a really creamy lather. The natural scent softens but stays earthy-fresh.
Because the top stays a little rustic and the color is so bright, the bars look awesome as gifts or in your own shower. Plus, your skin will love the gentle cleanse and subtle glow that develop after steady use. You’ll probably start to get requests from friends who spot your colorful bars and want some for themselves!
Your Final Carrot Soap Action Plan:
- Gather your equipment and fresh ingredients.
- Be strict with measurements and safety steps, especially with lye.
- Mix, pour, and swirl your first carrot batch.
- Cure the bars for a full month before using.
In conclusion, homemade carrot soap is a cool way to treat your skin. Once you get the basics down, you’ll probably want to keep making (and sharing) new batches! Additionally, Try experimenting with natural colorants like turmeric or adding a few drops of gentle herbal essential oils for a personal touch. Before you know it, you’ll have a lineup of unique, gorgeous bars that give your skin a fresh glow every day.
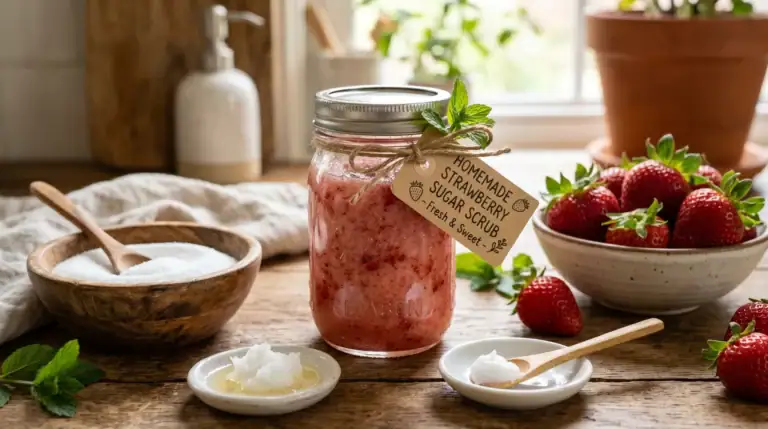
Looking for more DIY soap and scrub ideas? Don’t miss my Coffee and Coconut Oil Exfoliator recipe →.

I’ve seen carrot soap mentioned a lot lately, but this is one of the clearer guides I’ve read on it. I liked that you explained both the potential benefits and the importance of checking ingredients instead of just assuming every carrot soap product is the same. A lot of people skip that part.
The section about skin type was helpful too, because some products that work great for oily skin can end up drying out sensitive skin pretty fast. Have you personally noticed any difference between handmade carrot soaps and the more commercial brands?
Thank you so much for your thoughtful feedback I’m really glad you found the guide clear and balanced!
You make an excellent point about ingredient awareness. Not all carrot soaps are formulated the same way, and checking the full ingredient list is so important, especially for people with sensitive or dry skin. Sometimes products are marketed around one key ingredient while containing other additives that may not suit every skin type.
In my experience, handmade carrot soaps often feel gentler and more moisturizing because they usually contain simpler formulations and nourishing oils or butters. Commercial versions can still work well, but some may include stronger fragrances, detergents, or preservatives that can feel more drying depending on the formula.
That said, it really comes down to the quality of ingredients and how your individual skin responds. Patch testing and paying attention to how your skin feels over time is always the best approach.
Thank you again for sharing such a thoughtful perspective and question!
This was really interesting to read because I’ve been making soap for years but have never actually tried carrot soap myself. I do love using natural ingredients in soap though, especially things that add a gentle feel and natural color to the bars. Your point about carrot puree helping create a creamy, skin-loving soap definitely makes me want to try a batch sometime. Have you found the carrot color stays bright after a full cure, or does it fade more over time?
Thank you so much for your thoughtful comment! It’s always wonderful hearing from someone with soap-making experience, especially someone who appreciates working with natural ingredients.
Carrot puree can be a really lovely addition to soap because it often helps create a creamy, gentle feel while also adding natural sugars that can contribute to a nice lather. The natural color is definitely part of the appeal too.
In most cases, though, the bright orange color does tend to soften and fade somewhat during the curing process, especially in cold process soap. The final shade often becomes more muted—usually a warm cream, pale peach, or light golden tone depending on the oils used, the amount of carrot puree added, and whether the soap goes through gel phase.
Some soap makers combine carrot puree with natural colorants like turmeric or annatto to help maintain warmer tones for longer, but even then, natural colors generally mellow over time compared to synthetic pigments.
It sounds like carrot soap would fit beautifully into the kind of natural soap-making you already enjoy. Thank you again for sharing your experience and thoughtful question!
I did not know Carrot Soap existed, but I do now. The article explains everything you need to know about Carrot Soap. I will certainly use some of the advice on my website which highlights Skin Care benefits. Describing betacarotene and Vitamin A supports your skin by fighting free radicals helping Skin glow and anti-aging ingredients were great information shared. I really enjoyed the article including the benefits, safety tips and a plan of action. I will definitely look into your other articles and website. I am now a Carrot Soap fan. Great work!
I did not know Carrot Soap existed, but I do now. The article explains everything you need to know about Carrot Soap. I will certainly use some of the advice on my website which highlights Skin Care benefits. Describing betacarotene and Vitamin A supports your skin by fighting free radicals helping Skin glow and anti-aging ingredients were great information shared. I really enjoyed the article including the benefits, safety tips and a plan of action. I will definitely look into your other articles and website. I am now a Carrot Soap fan. Great work!
Thank you so much for your kind and encouraging comment! I’m so glad you enjoyed the article and found the information about carrot soap helpful and interesting.
Carrot soap definitely surprises a lot of people at first, but once they learn about the natural beta-carotene, Vitamin A support, and antioxidant properties, it starts to make sense why it has become so popular in natural skincare routines. I’m happy the explanations about free radicals, skin glow, and anti-aging support were useful and easy to understand.
It also means a lot to hear that you found the balance of benefits, safety tips, and practical guidance valuable enough to share on your own skincare website. That’s truly appreciated.
Thank you again for your thoughtful support and for taking the time to explore the content further. I’m so happy to hear you’ve officially become a carrot soap fan!
I believe this guide is more technical and scientific than many people expect, but the explanations were still easy to follow and beginner friendly. It was also good that the article included safety reminders, troubleshooting tips, and realistic expectations instead of only focusing on the benefits. I especially liked the explanation about cure time because I notice many beginners want immediate results without understanding that some processes take patience and proper preparation.
Thank you for your thoughtful comment!
I’m glad you found the guide clear while still more technical and beginner friendly. You’re absolutely right many beginners expect quick results, but skincare especially processes like fading pigmentation or product formulation really does require patience and proper steps like cure time.
That’s why including safety reminders, troubleshooting, and realistic timelines is so important it helps set expectations and prevents frustration early on.
Thanks again for sharing your perspective!
This was such a beautifully detailed guide. I love how you broke down each step in a way that feels approachable, even for someone who doesn’t make soap often. The explanation of why carrot is so powerful for brightening and nourishing the skin was especially helpful — it’s such an underrated ingredient, and you made the benefits really clear.
I also appreciate that you kept the recipe clean and intentional. So many “glow” products rely on harsh additives, but this feels like something that would genuinely support the skin barrier while still giving that soft, healthy radiance. The visuals and instructions made the whole process feel like a calming little ritual.
Thank you so much for your thoughtful comment! I’m really glad the guide felt approachable and calming while still explaining the benefits of carrot soap clearly.
You’re absolutely right carrot is often underrated in skincare, yet it can be wonderfully nourishing and supportive for healthy-looking skin. I also appreciate you mentioning the focus on gentle, intentional ingredients rather than harsh additives. In many cases, simple and balanced formulas work best for supporting the skin barrier and maintaining a natural glow.
Thank you again for your kind words and thoughtful feedback!
I never thought that a simple ingredient like carrots would have so many benefits for the skin. I know they are healthy to eat. Can one make their own carrot puree in a blender or would one have to get the kind you get at the health shop to make this soap. I would like to try it out. Also, can one use this on facial skin or is this soap purely for the body?
Thank you for your thoughtful comment! A lot of people are surprised by how beneficial carrots can be for the skin because they’re usually only thought of as a healthy food.
Yes, you can absolutely make your own carrot puree at home using fresh carrots and a blender. Many people prefer doing that because it keeps the recipe simple and natural. Just make sure the puree is smooth and fresh before adding it to the soap mixture.
Carrot soap can often be used on both the body and the face, especially if the formula is gentle and moisturizing. However, since facial skin is usually more sensitive, it’s always a good idea to patch test first and avoid overusing it if your skin is easily irritated or very dry.
I hope you enjoy trying it out!